How to Put Molding on the Floor: A Step-by-Step Baseboard Installation
Learn how to install floor molding (baseboards) with precise measuring, clean cuts, and a mold-safe finish. Step-by-step instructions, tips, and safety for homeowners and renters.

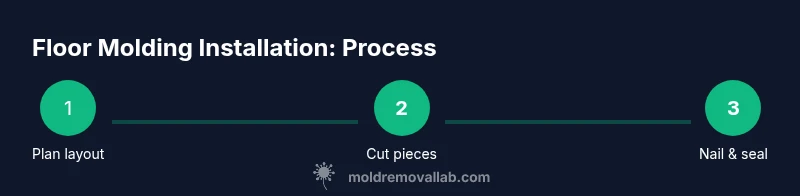
By following these steps, you will install floor molding (baseboards) along the wall-to-floor seam with accurate measurements, clean miters, secure fasteners, and a seamless finish. Start with layout planning, cut joints precisely, attach firmly into studs, fill gaps with caulk, and sand before painting. Prepare the surface, protect adjacent floors, and seal edges to prevent moisture intrusion. Follow the steps carefully to achieve durable, mold-resistant results.
Why floor molding matters and how moisture and mold risk tie in
Installing baseboard molding along the floor isn't just about aesthetics; it hides the seam between wall and floor and protects walls from damage. For homeowners and renters, it also creates a clean transition that simplifies cleaning and helps cover minor flooring irregularities. According to Mold Removal Lab, moisture control at the floor seam is essential to inhibiting mold risk when finishing a room. The Mold Removal Lab team found that properly sealed joints reduce hidden moisture pockets that can become mold hotspots. By planning profile choices and layout before you cut, you set the stage for a durable, mold-safe installation. This guide focuses on baseboard molding for typical interior spaces, with practical steps you can follow step by step, from layout to finish. We’ll emphasize moisture-aware practices and safe, solvent-free finishes that help protect living spaces.
Tools and materials you’ll need
Before you start, gather the essential tools and materials. Having everything on hand reduces interruptions and ensures clean seams. The following list covers items you’ll use most of the time; optional items can help in tricky corners or unusual wall/floor conditions. If you’re repairing or updating an older home, you may need extra shims or filler for a perfect fit. Keep a damp rag handy to wipe dust after cutting and a small brush for cleaning sawdust from the groove.
Measuring and layout planning for a clean fit
Accurate measuring is the foundation of a clean baseboard installation. Start by establishing a straight line along the wall using a level or laser line. Mark starting points at exterior corners or along the longest straight run, noting any door casings or large HVAC registers that require cutouts. Plan the layout so that end pieces meet at least one stud depth away from the corner to maximize hold. For outside corners, you’ll need 45-degree miter cuts; for inside corners, you’ll cut complementary angles. Double-check lengths before cutting to prevent short pieces or gaps. The goal is to keep a consistent reveal between baseboard and wall and to avoid gaps that can trap moisture.
Cutting baseboard molding with precision
Cutting accurate angles is essential for tight joints. Use a miter saw or a sharp hand saw with a miter box to achieve clean 45-degree angles for outside corners and precise complementary cuts for inside corners. Always cut with the finished face down on the saw to minimize tear-out, and label each piece with its location to avoid misalignment. Test-fit pieces dry before nailing to ensure joints align flush and maintain a uniform gap against the wall. If walls are not perfectly square, adjust with careful trimming rather than forcing a piece into a misaligned corner.
Dry-fit and alignment checks
Dry-fitting allows you to confirm that all pieces align straight and that corners satisfy the visual standards you want. Place each piece in its approximate position, checking the top edge for a uniform line along the wall and verifying that the baseboard sits evenly along the floor. Make note of any high spots or gaps and trim accordingly. Hold each piece with a small spacer at the bottom to mimic the actual floor gap, ensuring there’s room for caulk and paint. A well-planned dry-fit reduces the risk of re-cutting and helps you anticipate potential problem areas before fastening.
Install the molding securely
Begin fastening from a corner or a long straight run. Drive finish nails into the stud line where possible; avoid hitting electrical boxes or plumbing behind the wall. If you don’t have a stud every 16 inches, use a nail anchor or adhesive in addition to nails for extra hold in softer materials. Use a nail set to countersink nail heads slightly below the surface and fill with wood filler after nailing. Check for any bowing or warping; if needed, remove a nail, adjust, and re-nail to maintain a straight line. Finally, wipe away dust and prepare the surface for sealing and finishing.
Finishing touches: caulk, fill, and paint
Fill nail holes and any gaps with wood filler or caulk that matches the paint or stain. Allow filler to dry completely, then sand smooth to achieve a seamless transition between wall and baseboard. Apply painter’s tape along the wall to create crisp paint lines, then apply your finish coat. If you’re painting, use a primer first for better adhesion and coverage. After painting, inspect the joints and touch up any missed spots. The last step is a thorough wipe-down to remove dust and ensure a clean, professional look.
Mold prevention: moisture control around floor moldings
Properly installed molding should help minimize moisture entrapment at the wall-floor junction. Ensure the bottom edge remains slightly clear of the floor on damp substrates to allow a thin gap for air and moisture to escape. When possible, seal adjacent edges with a paintable caulk that remains flexible over time, especially in high-humidity spaces. Ensure the room is dry during sealing and painting to prevent trapping moisture underneath the finish. Based on Mold Removal Lab analysis, moisture management and a sealed finish are critical steps in mold prevention around new floor moldings.
Maintenance and routine checks after installation
Periodically inspect the molding for cracks, gaps, or loose nails, particularly in areas exposed to water splash or high humidity (kitchens, bathrooms, entryways). Touch up paint as needed and re-seal any joints every few years or after significant humidity changes. Keep the floor area clean and dry, and promptly address any water intrusion near the baseboard. A proactive maintenance routine reduces the likelihood of mold growth and helps preserve the appearance of the molding over time.
Alternatives for irregular walls or concrete floors
If your walls aren’t perfectly straight or you’re installing over a concrete subfloor, look for flexible or pre-finished profiles designed for uneven surfaces. Consider using expansion gaps or slightly larger baseboards with caulk to accommodate minor irregularities. For concrete floors, you may need a specialized masonry caulk or adhesive along with corrosion-resistant fasteners to secure the molding without damaging the substrate. Always test a small area before committing to the full installation.
Tools & Materials
- Measuring tape (25 ft)(For precise length and layout)
- Miter saw or sharp hand saw(For clean 45-degree cuts)
- Nail gun or finishing nails (15-16 ga)(Avoid splitting; use a nail set)
- Hammer or nail set(Optional if not using nail gun)
- Caulk gun and paintable caulk(Seal gaps between baseboard and wall)
- Wood filler or auto filler(Fill nail holes)
- Putty knife
- Sandpaper (120-220 grit)(Smooths joints)
- Primer/paint or stain(Finish coat)
- Pencil, level, stud finder
- Masking tape
- Expansion spacers or shims (optional)(To account for floor irregularities)
- Moisture barrier (plastic sheeting) if installing over damp substrate(Helps mold prevention)
Steps
Estimated time: 60-120 minutes
- 1
Prepare the space and plan layout
Clear the area, remove obstacles, and determine starting points. Measure walls, mark straight lines, and plan corner treatments. Double-check that the planned lengths align with studs for secure fastening. This step reduces miscuts and ensures a straight, clean line.
Tip: Always mark all cut lines on the piece before cutting to avoid mistakes; a dry-fit first helps confirm alignment. - 2
Cut molding to exact lengths and miter corners
Cut outside corner pieces with 45-degree miter cuts; inside corners require complementary angles. Cut from the same face to avoid tear-out, and label each piece with its location. Test-fit each segment before fastening.
Tip: Use stop blocks on the saw to keep all pieces identical and prevent depth variation. - 3
Dry-fit the pieces and adjust as needed
Place pieces along the wall to verify alignment and fit. Note any gaps or high spots and trim accordingly. Ensure the bottom edge sits evenly on the floor and that corner joints meet flush.
Tip: Keep a small spacer in place during dry-fit to simulate the real floor gap. - 4
Attach molding securely
Nail into studs when possible using a nail gun or finish nails. Countersink heads with a nail set and fill holes later. Check for warping and re-nail if needed to maintain a straight line.
Tip: Avoid nailing too close to the corner to prevent splitting; leave a tiny gap for caulk. - 5
Fill gaps and holes, then seal
Apply wood filler to nail holes and caulk along the wall base. Allow filler to dry, sand smooth, and wipe away dust. Apply primer and paint or stain as desired for a uniform finish.
Tip: Choose a paintable caulk that remains flexible for long-term sealing. - 6
Finish and inspect for mold-safety
Inspect all joints for seams and gaps. Re-caulk where necessary and ensure there is a clean, tight finish. Wipe down the surface to remove any residue and ensure nothing interferes with floor cleaning.
Tip: Work in a well-ventilated area to help paint dry evenly and reduce indoor moisture.
FAQ
Do I need a gap between the molding and the floor?
Yes. A small gap allows for expansion and air flow, reducing stress on the molding and helping prevent moisture buildup. Use a consistent gap along the entire length and fill any visible gaps with paintable caulk.
There should be a small gap between the baseboard and the floor to allow for expansion and moisture control.
Can I install molding directly on a concrete floor?
You can install baseboards on concrete, but you’ll want anchor screws or masonry nails and a suitable adhesive. Seal the bottom edge to prevent moisture intrusion and use a compatible caulk for a tight seal.
Yes, with masonry fasteners and appropriate adhesive, but ensure a clean, dry surface first.
What type of nails are best for baseboard molding?
Finish nails (15-16 gauge) are commonly used for baseboards. They hold well without splitting the wood surface when driven with a nail set. If you’re using a nail gun, set the nails just below the surface and fill the holes.
Finish nails work well; use a nail set to countersink them for a clean look.
Should I paint before or after installation?
Paint before installation when possible to minimize masking and achieve a uniform coat. If you paint after, protect walls and floor with tape and drop cloths, and prime before applying finish coats.
Painting before installation is often easier, but either way, prime and seal first for best results.
How can I reduce the risk of mold when installing molding?
Keep the area dry during and after installation. Use a flexible caulk for joints, ensure good ventilation, and consider a moisture barrier if the space is prone to dampness. Regularly inspect for leaks at the floor seam.
Keep the space dry, seal joints, and ensure good ventilation to reduce mold risk.
Watch Video
The Essentials
- Measure accurately before cutting.
- Seal seams and holes to prevent moisture intrusion.
- Nail into studs and fill gaps for a durable finish.
- Use moisture-resistant materials and sealants in damp spaces.