How to Put Molding Back on Car Door: A Complete Guide
Learn how to put molding back on a car door with a thorough, safe reattachment process. Prep the surface, pick the right adhesive or clips, properly align, and cure for a lasting finish.

You can successfully reinstall car door molding by cleaning the area, selecting the correct attachment method (clips, tape, or screws), and aligning the molding precisely before securing it. Key requirements include a clean surface, proper fasteners, and patience for proper seating. This steps-based guide will help you reattach molding safely and effectively.
Safety and Assessment
According to Mold Removal Lab, reattaching car door molding requires a calm, methodical approach to avoid paint damage and ensure a lasting seal. Start by identifying the molding type (clip-on, tape-backed, or screw-fixed) and checking for cracks in the molding or door skin. A misaligned piece can trap moisture and dust, creating poor adhesion and wind noise. Evaluate the door seam, weatherstripping, and the underlying metal for rust or corrosion. When in doubt, consult your vehicle’s service manual or a professional. In addition, verify that you have the correct replacement trim and compatible fasteners. A quick visual check now saves you from repeated repair later.
Tools and Materials You'll Need
Before you begin, gather the essential tools and materials. This list covers common scenarios and helps you avoid mid-project trips to the parts store.
- Clean microfiber cloth (essential) — for wiping the channel and molding surfaces
- Isopropyl alcohol (70%) (essential) — to degrease and prep the surface
- Soft plastic pry tool or trim removal tool (essential) — to lift the molding without scratching paint
- Automotive double-sided tape or appropriate adhesive (essential) — select based on your molding type
- Replacement molding clips or fasteners (optional) — only if the current clips are damaged
- Weatherstrip adhesive or contact cement (optional) — when using a tape-based or loose-fit molding
- Masking tape (essential) — for temporary alignment and protection of nearby paint
- Adhesive remover (optional) — to clean old residue without harming paint
- Heat source (hair dryer or heat gun, optional) — can improve tape adhesion in cooler conditions
Understanding Molding Types and Attachment Methods
Car door moldings attach in several ways, and choosing the right method is critical. Clip-on moldings use small fasteners that snap into the door surface; tape-backed or “peel-and-stick” trim relies on strong automotive double-sided tape; screw-fixed moldings require small fasteners that go through the molding into the door frame. Weatherstripping and seals also affect how the molding seats. If your molding includes pre-installed clips, ensure those clips are intact. If you’re unsure which method your vehicle uses, inspect the molding channel and check for clip remnants or adhesive tape backing. Matching the method to your molding type improves grip and reduces future detachment.
Surface Prep and Adhesive Considerations
Cleanliness is critical. Any dust, wax, or old adhesive left on the door or molding reduces bonding strength. Wipe the channel with isopropyl alcohol, dry completely, and inspect for rust. If you find corrosion, address it before reinstalling moldings to prevent future gaps. When using adhesive, pick a product compatible with automotive paint and the molding material (plastic, vinyl, or metal). If you opt for clips, verify the clip fit by dry-fitting before applying any adhesive. Mold Removal Lab’s guidelines emphasize a thorough prep to ensure the seal remains intact and the molding seats evenly.
Preparation and Fit: Testing Before Committing
A dry fit ensures you know where to start and how the molding will lay against the door edge. Place the molding piece along its intended path without adhesive or clips and check alignment with door edges, seam lines, and trim around the window. If the molding isn’t sitting flush, adjust its position or consider replacing damaged clips or the molding itself. Once you’re happy with the fit, mark key contact points with masking tape to guide final placement. This per-session testing step reduces guesswork and helps you achieve a clean, uniform look.
Adhesive Options and Step-By-Step Alignment
Adhesive-based methods require careful selection. Peel-and-stick tapes offer quicker results but demand clean, dry temperatures and a cured time before exposure to rain or washing. Clips provide a mechanical hold that can be more forgiving of imperfect surfaces but require precise alignment. Whenever possible, follow the manufacturer’s instructions for cure times and surface prep. If you’re unsure about adhesive choice, perform a small test area first to gauge bonding and paint compatibility.
Weather, Temperature, and Curing Considerations
Ambient temperature and humidity influence adhesive performance. If you’re working in cold weather, wait for warmer daytime hours or use a heat source to bring surfaces to an ideal temperature before applying tape-based moldings. Protect the area from moisture until the adhesive has fully cured. Quick fixes may fail under rain or car washing, causing re-detachment. If paint is peeling or the metal shows signs of rust, address those issues before proceeding with molding reattachment.
Maintenance, Checks, and Common Pitfalls
After reinstallation, inspect the molding periodically for loosening, gaps, or peeling edges. Re-clean the area periodically to maintain adhesion and prevent dirt buildup that can degrade the seal. Common mistakes include using overly strong solvents that soften adhesives, applying too much adhesive, or rushing the fit. A careful approach, with patience and the right materials, yields a lasting finish.
Tools & Materials
- Clean microfiber cloth(Use dry for final wipe; keep lint-free.)
- Isopropyl alcohol (70%)(Degrease and prep the channel and molding surface.)
- Soft plastic pry tool(Avoid metal tools to prevent paint scratches.)
- Automotive double-sided tape(Choose high-bond tape rated for exterior use)
- Replacement molding clips/fasteners(Only if existing clips are damaged or missing)
- Weatherstrip adhesive or contact cement(For some clip-less installations)
- Masking tape(Mark alignment points and protect nearby paint)
- Adhesive remover(Gentle solvent to remove old residue)
- Heat source (hair dryer/heat gun)(Helpful in cool environments to improve tape adhesion)
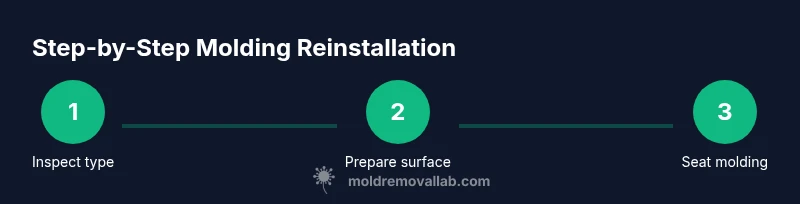
Steps
Estimated time: 60-90 minutes
- 1
Inspect molding type and condition
Begin by identifying how your molding is attached (clip-on, tape-backed, or screw-fixed). Check for any cracks, damaged clips, or worn tape. If the molding or clips are compromised, replace them before proceeding to avoid failure after reinstallation.
Tip: Take a quick photo of the current setup for reference if you need to reorder parts. - 2
Clean the mounting surface
Wipe the door channel and the back of the molding with isopropyl alcohol on a microfiber cloth until the surface is dry and free of wax or oil. Avoid using harsh solvents that can dull the paint. A clean surface ensures the adhesive bonds properly.
Tip: If old adhesive remains, use a gentle adhesive remover and re-clean before applying new tape. - 3
Test-fit the molding
Lay the molding in its intended position to verify alignment with door edge lines and window frame. Mark contact points with masking tape so you have a clear guide during final attachment. Do not apply adhesive yet if the fit isn’t perfect.
Tip: Use a helper to hold the molding while you check every alignment point. - 4
Apply adhesive or prepare clips
If using tape, cut sections to fit the length and apply evenly along the molding’s back. Press the tape to secure it firmly and remove the liner just before installation. If using clips, ensure each clip snaps cleanly into place and aligns with the door’s channel.
Tip: Press firmly along the entire length to avoid air bubbles under the tape. - 5
Install the molding with steady pressure
Starting at a fixed point, press the molding into place along the door seam, applying even pressure for several seconds to seat the adhesive or clip. Maintain consistent pressure to avoid creating gaps. Use masking tape to hold it temporarily if needed.
Tip: Work from one end to the other to preserve alignment and reduce the chance of misfit. - 6
Cure and verify
Allow the adhesive to cure per the product’s instructions before washing the car or exposing it to heavy rain. Inspect the edges for even seating and re-secure any loose areas if necessary. Test the seal by wiping with a damp cloth and listening for any popping sounds when closing the door.
Tip: Avoid aggressive door slams during curing to prevent misalignment.
FAQ
What adhesive is best for car door molding?
The best adhesive depends on your molding type. Tape-based methods use automotive double-sided tape designed for exterior use, while clip-on moldings rely on the original fasteners. Always choose adhesives recommended by the molding manufacturer and compatible with your paint.
For best results, choose the adhesive type recommended by your molding manufacturer and ensure compatibility with your vehicle’s paint.
Can I reuse old molding clips?
Reusing old clips is possible if they are intact and seat firmly. Inspect each clip for wear or deformation; damaged clips should be replaced to avoid future detachment.
If clips look undamaged and seat firmly, you can reuse them; otherwise replace with new clips to ensure a secure fit.
What if the molding is cracked or warped?
A cracked or warped molding should be replaced to ensure a proper seal and appearance. Attempting to bend or glue a damaged piece will likely fail and could cause further damage.
Replace damaged moldings rather than trying to repair them; a good seal depends on intact trim.
How long should I wait after installation before washing the car?
Follow the adhesive manufacturer’s cure time, typically 24 hours for most tapes. Avoid washing or exposing the molding to aggressive cleaners during this period.
Let the adhesive cure for about a day before washing; check the product’s specific guidance.
Why does the molding detach after a few weeks?
Causes can include inadequate surface prep, incompatible adhesive, or improper alignment. Revisit each step: clean thoroughly, choose the right attachment method, and ensure a precise fit before final installation.
If it detaches again, recheck prep, adhesive choice, and alignment; a proper fit prevents recurrent detachment.
Watch Video
The Essentials
- Prepare surfaces thoroughly before reinstall.
- Choose the correct attachment method for your molding type.
- Align accurately before securing to avoid gaps.
- Allow proper curing time for adhesive-based installations.
- Inspect and maintain fit after installation.