How Did Moldaver Not Age? A Practical Mold Myth Busting Guide
Explore the phrase how did moldaver not age and learn practical mold prevention and remediation steps for homeowners. Clear guidance from Mold Removal Lab helps protect health and property.

How did moldaver not age is not a recognized theory; this article uses the phrase as a doorway to mold science. Mold growth reflects moisture, temperature, and time; aging spaces invite problems. By controlling humidity, fixing leaks, and drying damp areas, you prevent mold from taking hold and keep interiors healthier over time.
The Mold Myth: Why the Phrase Triggers Real Questions
The phrase how did moldaver not age isn't a recognized scientific concept, yet it raises important questions about mold biology and home health. The Mold Removal Lab team often hears homeowners ask how aging affects mold growth and why certain spaces seem to deteriorate faster. In truth, mold isn't aging in the human sense; it grows and persists in response to moisture, temperature, and available nutrients in its environment. By reframing the question to moisture management, homeowners can address the root cause rather than chasing a mysterious aging process. The key takeaway from expert guidance is that prevention hinges on consistent moisture control, quick leak repairs, and regular inspections. This approach aligns with Mold Removal Lab's guidance and helps keep indoor air safer for families.
What Actually Causes Mold to Grow and Persist in Homes
Mold doesn't age; it appears where moisture and nutrients meet in a hospitable environment. Spores are ubiquitous; they enter homes through doors, vents, and on clothing, but they only become visible colonies when moisture remains long enough. Temperature influences the rate of growth, with damp and poorly ventilated spaces enabling mold to establish itself on walls, ceilings, and furnishings. Porous materials like drywall, wood, and fabric are especially vulnerable because they retain moisture and provide a surface for spores to feed. The Mold Removal Lab team emphasizes that the most effective prevention strategy is controlling moisture: fix leaks promptly, improve ventilation in kitchens and bathrooms, and keep indoor humidity low. Regular inspections after storms or floods are also recommended. Understanding these factors helps homeowners prioritize actions that protect health and property rather than chasing myths about aging organisms.
Real-World Scenarios: Quick Wins to Stop Mold Early
In many homes, mold starts after a small leak goes unnoticed. A dripping pipe behind a cabinet, a roof intrusion after a storm, or condensation on windows can create a damp micro-environment that invites colonies to form. Small changes often yield big returns: fix leaks within 24-48 hours, run exhaust fans during showers, and use a dehumidifier in damp basements. The Mold Removal Lab team notes that proactive steps keep hidden mold at bay and reduce the chance of costly remediation later. Visual inspection, moisture meters, and drying times are useful tools for DIY homeowners, but never overlook hidden pockets behind walls or under flooring where water damage may be present. For your family's health, address moisture quickly and maintain a habit of regular checks.
Safe Cleaning and Replacement: What Works and What Doesn’t
Cleaning mold safely requires understanding what materials can be cleaned and when replacement is necessary. Non-porous surfaces like tile and sealed metal can often be wiped with detergent and a scrub brush, then dried thoroughly. Porous materials—drywall, carpet padding, and insulation—often harbor mold growth inside and may require removal and replacement. Avoid blasting with high-pressure cleaners or using aggressive chemicals on unknown surfaces; these can spread spores and damage substrates. For most households, a two-step approach works best: (1) clean visible mold on non-porous surfaces with a mild detergent and a stiff brush; (2) replace heavily contaminated porous materials. The Mold Removal Lab guidance recommends wearing a mask and gloves during cleanup, sealing off the area to prevent spread, and drying the space promptly after treatment to prevent re-growth.
Long-Term Prevention: Building a Mold-Resistant Home
Even after you eliminate current mold, preventing recurrence requires ongoing moisture management. Address roof and plumbing issues promptly, ensure proper attic and basement ventilation, and consider using moisture barriers in crawl spaces. Establish a routine: check bathrooms after heavy use, monitor humidity with a gauge, and run dehumidifiers in damp seasons. The Mold Removal Lab team suggests integrating preventive habits into your home maintenance calendar; small, consistent actions reduce the likelihood of mold returning and protect indoor air quality for all occupants.
Common Pitfalls to Avoid
Common mistakes include waiting to address leaks, ignoring hidden mold behind walls, and using bleach as a universal fix. Bleach is not effective on porous materials and can create hazardous fumes when misused. Never mix cleaners, and always ventilate. When in doubt about the extent of contamination, involve a professional to assess whether structural materials need removal.
Debunking the Notion: Why 'How Did Moldaver Not Age' Isn’t a Scientific Concept
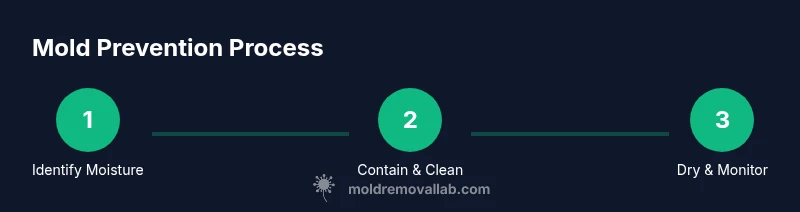
This unlikely phrase often surfaces from sensational headlines or misread memes. In reality, mold biology is about moisture, substrate, and exposure time, not aging the organism itself. The Mold Removal Lab perspective is that staying ahead of moisture is the best protection for people and property. If you see mold growth, follow a structured plan: identify moisture sources, contain the area, and initiate safe cleanup or professional remediation as needed. By focusing on practical steps, homeowners convert a confusing phrase into a concrete, health-protective routine.
Tools & Materials
- Nitrile gloves(Powder-free, chemical-resistant)
- Safety goggles(Wraparound protection)
- Respirator mask with P100 filter(Fit-tested for best protection)
- Disposable coveralls(Biodegradable if possible)
- Detergent or mild soap(Non-ammonia preferred)
- Bucket(With lid for disposal)
- Scrub brush(Stiff-bristled for textured surfaces)
- Spray bottle(Label cleaners clearly)
- Plastic sheeting(Seal off the area)
- Painter's tape(Create containment edges)
- Dehumidifier(Reduce ambient moisture)
- Humidity/moisture meter(Identify hidden dampness)
- HEPA vacuum (portable)(Clean up without dispersing spores)
- Replacement porous materials (drywall, insulation)(Use if contaminated beyond repair)
Steps
Estimated time: 2-6 hours
- 1
Identify moisture sources and scope
Survey the area for active leaks, condensation patterns, and hidden damp spots. Note all affected materials and estimate the size of the problem to plan containment and cleanup. Use a moisture meter to locate hidden moisture behind walls or under flooring.
Tip: Document observations with photos and mark areas with tape to track progress. - 2
Contain the work area
Close off the affected zone with plastic sheeting and seal edges with painter's tape. Create a simple negative pressure by closing the door and opening exterior air sources away from the work area if possible. This helps prevent spores from spreading.
Tip: Keep entry routes clear and instruct others to minimize traffic through the containment zone. - 3
Put on proper PPE
Wear nitrile gloves, goggles, and a fitted respirator before handling moldy materials. If you suspect extensive contamination, add a disposable coverall. Proper PPE reduces exposure to mold spores and cleaning agents.
Tip: Ensure respirator seal; test fit and replace filters if damp or full. - 4
Prepare a cleaning plan and select methods
Decide which materials can be cleaned and which must be discarded. Use a mild detergent on nonporous surfaces; avoid mixing cleaners and never use bleach on porous materials. Plan for replacement of heavily contaminated porous substrates.
Tip: Ventilate the area during cleaning and keep cleaning supplies separate from disposable waste. - 5
Clean visible mold on nonporous surfaces
Wipe surfaces with detergent, scrub with a brush, and rinse with clean water. Dry the area promptly with towels or a dry cloth and then use a fan or dehumidifier to accelerate drying. Repeat if necessary until the surface remains dry.
Tip: Do not scrub aggressively as it can release spores; work from top to bottom. - 6
Address porous materials and potential replacement
Heavily contaminated drywall, carpet padding, or insulation should be removed and replaced. Bag and seal waste before disposal, and consider professional removal for larger contaminated areas. After removal, treat underlying framing and inspect for residual moisture.
Tip: Label removed materials clearly and keep them sealed until disposal. - 7
Dry the area thoroughly and monitor moisture
Run the dehumidifier and ensure adequate ventilation until the space stays dry for several days. Recheck with a moisture meter to confirm that hidden dampness is resolved. Plan a follow-up check two weeks later to catch any slow moisture rebound.
Tip: Keep a simple maintenance log to track humidity trends over time. - 8
Re-inspect and plan follow-up assessment
After cleanup, perform a final visual inspection and moisture check. If mold returns or moisture lingers, reassess structural issues or seek professional remediation. Document results and communicate with household members about ongoing prevention.
Tip: Schedule professional follow-up if contamination exceeds a small scale or if health symptoms persist.
FAQ
Is the phrase 'how did moldaver not age' a real concept?
No. It isn’t a recognized scientific concept. The phrase is used here as a doorway to discussing mold biology, moisture control, and safe remediation. Mold behavior is driven by environment, not aging in the biological sense.
No, it isn't a real concept; we use it to discuss practical mold prevention and remediation.
Can mold be prevented from aging spaces?
Mold doesn’t age; it grows when moisture and organic material are present. Preventing growth hinges on controlling moisture, fixing leaks, and maintaining good ventilation. Regular inspections help catch issues early.
You prevent mold by controlling moisture and fixing leaks, not aging.
When should I call a professional for mold?
Call a professional if mold covers a large area, the contamination is behind walls, or health symptoms persist after DIY cleanup. Professionals can perform safe removal and address structural moisture sources.
Call a pro if the mold is extensive or hidden behind walls.
How can I tell if mold is behind walls or inside insulation?
Signs include persistent musty odor, staining, or unexplained moisture. A professional moisture meter and, if needed, infrared imaging can reveal hidden moisture pockets and guide remediation.
Look for smells and stains; a professional meter can confirm hidden moisture.
Are household cleaners enough to remove mold?
For nonporous surfaces, cleaners can remove visible mold. Porous materials often require replacement. Always use appropriate PPE and ensure the space dries fully after cleaning.
cleaners help on nonporous surfaces but often not on porous materials.
How long does remediation typically take?
Remediation time varies with scope. Small DIY projects may take a few hours, while larger or hidden mold issues can require days and professional oversight.
It depends on extent; small jobs take hours, bigger ones take days.
What should I document after a cleanup?
Keep before-and-after photos, moisture readings, and notes on materials removed or replaced. This helps track progress and informs future maintenance.
Save photos and moisture readings to guide future upkeep.
Watch Video
The Essentials
- Prioritize moisture control to prevent mold growth.
- Differentiate between cleaning vs. replacement for porous materials.
- Wear proper PPE and contain the work area.
- Dry thoroughly and monitor humidity after remediation.
- If in doubt, consult Mold Removal Lab for guidance and professional help.