How to Safely Clean and Preserve an Easter Bunny Blow Mold
A practical, step-by-step guide to safely inspect, clean, and store Easter bunny blow mold decorations to prevent mold growth and keep your holiday decor healthy.

You will learn to safely assess, clean, and restore an Easter bunny blow mold to prevent mold growth. This quick guide covers identifying mold, choosing safe cleaners, and drying/storage best practices. By following step-by-step instructions, homeowners can preserve holiday decorations without exposure to mold spores. Ready to treat your Easter bunny blow mold? Let's begin with a practical, family-safe method.
Understanding the Mold Risk in Easter Bunny Blow Mold
According to Mold Removal Lab, holiday decorations like the easter bunny blow mold are designed from non-porous plastics that can still harbor mold if stored damp or exposed to humidity. Even when a surface seems clean, micro-dirt, dust, and moisture can create microenvironments where mold spores cling and multiply. The Mold Removal Lab team found that simple, non-porous items often hide lingering spores that become visible only after a cleaning cycle, especially in storage boxes or closets with poor air circulation. This section helps you recognize why an Easter bunny blow mold needs careful handling, even if it looks pristine at first glance. Expect to see dark gray or green flecks, fuzzy growth, or musty odors that indicate contamination. When in doubt, treat it as contaminated and follow a thorough cleaning process to minimize any mold exposure to your family.
How Blow Molds Harbor Moisture and Why They Mold
Blow molds are typically made from clear or colored polystyrene or vinyl, materials that can trap residual moisture after a seasonal display. The most common mold growth arises from humidity during storage, minor leaks in basements or attics, or condensation in humid climates. Even small amounts of moisture can allow mold spores to settle and form visible colonies over time. A key insight from Mold Removal Lab analysis is that mold on blow molds often mimics dirt rather than obvious growth, making routine checks essential before reusing a decoration. Regular inspection helps catch problems early and reduces the risk of respiratory exposure for household members, especially children and allergy-prone individuals.
Materials and Safety Precautions Before Cleaning
Before you touch the Easter bunny blow mold, assemble a basic kit that protects your eyes, nose, and skin. Non-abrasive cleaning tools, mild detergents, and food-safe cleaners are preferable to harsh solvents that may damage the plastic or fade colors. PPE should include nitrile gloves, a dust mask or respirator, and safety glasses. Work in a well-ventilated area, ideally near an open window or with a small fan to move air away from your face. This approach is endorsed by Mold Removal Lab as a practical baseline for safe mold cleanup on household decorations, reducing exposure risk while preserving the item’s finish.
Cleaning Approaches for Non-Porous Blow Molds
Non-porous blow molds respond best to gentle, non-abrasive cleaning methods. Start with a solution of mild dish soap and warm water, using a soft sponge or microfiber cloth to wipe the surface. For more stubborn spots, a 1:1 mix of white vinegar and water can help break down mineral deposits and slow mold growth without harsh chemicals. If you choose to use hydrogen peroxide, apply it sparingly and test on a small area first to ensure the dye and transparency aren’t affected. Always rinse thoroughly with clean water after any cleaning solution to remove residue that could attract dirt again. These steps align with Mold Removal Lab’s safety-first approach for decorative plastics.
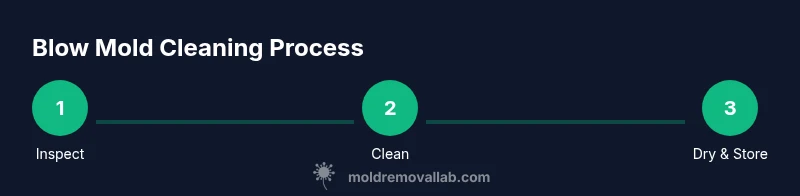
Step-by-Step Handling and Cleaning Process (Narrative)
Begin by removing any loose dust with a soft brush from top to bottom. Mix a gentle cleaning solution in a bowl and dampen a microfiber cloth. Wipe the entire surface in gentle, circular motions, paying special attention to crevices and engravings where mold can hide. For tougher spots, apply a small amount of vinegar solution and let it sit for a few minutes before scrubbing softly. Rinse the piece with a clean, damp cloth to remove soap and vinegar residue. Finally, dry the Easter bunny blow mold with a clean towel and allow it to air dry completely in a warm, dry area before the next step. This approach minimizes the risk of recontamination and helps maintain the original colors and details.
Drying, Sanitizing, and Storage to Prevent Recurrence
After cleaning, drying is the most crucial step. Use a dry towel to remove surface moisture, then place the item in a warm, dry area with good air circulation. If available, a fan or dehumidifier can speed up moisture removal. Once fully dry, you may apply a light wipe with 70% isopropyl alcohol to sanitize, followed by another air-dry. Store the Easter bunny blow mold in a sealed container with desiccant packs to keep humidity low. A dry, protected storage space reduces the chance of mold returning between seasons and preserves the decoration’s appearance for years to come.
When to Discard and How to Ventilate Storage Areas
If mold returns after cleaning, or if you notice persistent odor, discoloration that won’t scrub away, or structural damage to the blow mold, it may be safer to retire the item. Do not reuse a visibly mold-damaged decoration near food prep areas or kids’ rooms. Ventilate storage spaces regularly; consider using a dehumidifier in basements and closets, especially in humid climates. Regular airflow helps inhibit mold growth on holiday decorations and other seasonal items. Mold Removal Lab recommends erring on the side of safety when high contamination is present.
Prevention Tips for Future Easter Decorations
To prevent mold on your Easter bunny blow mold next season, ensure it is completely dry before packing away. Store in a breathable container or a box with silica gel or other desiccant packs. Keep the storage area dry, cool, and away from direct sunlight that can degrade plastic. If you reuse a display tree or shelf, ensure it isn’t placing the ornament in a damp corner. Consider lightweight, ventilated storage bins that allow air to circulate and reduce humidity. Routine checks once a year can catch early signs of moisture buildup before mold takes hold.
Common Mistakes and Troubleshooting
Common mistakes include skipping the drying stage, using overly harsh cleaners, or mixing cleaners with bleach on colored blow molds. Never use abrasive pads that can scratch the surface and hide micro-scratches where mold can hide. If you detect staining after cleaning, re-clean with a milder solution and rinse thoroughly. If you’re unsure about a tough spot, consult a professional or rely on non-toxic cleaners that are safe for plastics. By avoiding these missteps, you increase the chances of preserving the Easter bunny blow mold’s color and shape for future celebrations.
Tools & Materials
- Disposable nitrile gloves(Protect hands from mold and cleaners; choose a snug fit.)
- Safety goggles(Shield eyes from splashes and spores.)
- Face mask or respirator(Reduce inhalation of spores during cleaning.)
- Soft sponge or microfiber cloths(Gentle on plastic surface; prevents scratches.)
- Non-abrasive brush(Loosen surface grime without damage.)
- Mild dish soap(Household detergent for initial cleaning.)
- White vinegar(Natural mold-inhibitor; use diluted.)
- Hydrogen peroxide 3%(Optional for stubborn spots; test color First.)
- Isopropyl alcohol 70%(Optional sanitizing wipe on surface.)
- Desiccant packs (silica gel)(Store with blow mold after drying.)
- Seal-able storage container(Keeps dust out and reduces humidity.)
- Small fan or dehumidifier(Speeds up drying and reduces humidity.)
- Paper towels or microfiber cloths(For drying and blotting moisture.)
- Plastic bag for disposal (if discard)(Containment for any heavily moldy parts.)
Steps
Estimated time: 60-90 minutes
- 1
Inspect the item for contamination
Take a close look at the Easter bunny blow mold to identify visible mold, staining, or odors. Photograph any suspicious areas for reference. This helps determine whether you can safely clean at home or if professional care is needed.
Tip: Document any spots before cleaning to track changes. - 2
Prepare your cleaning area and PPE
Set up near an open window or with good ventilation. Put on gloves, goggles, and a mask to minimize exposure to spores and cleaners. Have all tools within reach to avoid re-contamination.
Tip: Ventilation reduces inhalation risk during cleaning. - 3
Remove loose debris and test a patch
Gently brush away loose dust. D apply a small amount of cleaner to a hidden patch and wait 1–2 minutes to observe any color change. If color fades, skip harsher cleaners and use milder options.
Tip: Always patch-test first on inconspicuous area. - 4
Clean with mild solution
Mix a few drops of mild dish soap with warm water. Wipe the surface with a soft cloth, focusing on crevices where mold hides. Rinse with a clean damp cloth to remove soap residue.
Tip: Use gentle, circular motions to avoid scratching. - 5
Address stubborn spots with vinegar or peroxide
If spots persist, apply a 1:1 vinegar-water solution or a tiny amount of hydrogen peroxide on the area. Let sit briefly, then wipe away. Rinse thoroughly to remove any remaining cleaner.
Tip: Avoid soaking the item; excess moisture promotes mold growth. - 6
Dry thoroughly and sanitize
Pat dry with a clean towel, then air-dry completely. If desired, wipe with 70% isopropyl alcohol and allow another air-dry. Ensure no moisture remains before storage.
Tip: Complete dryness is the key to mold prevention. - 7
Store properly in a dry environment
Place the blow mold in a sealed container with desiccants. Store in a cool, dry area away from humidity. Periodically check during off-seasons for any signs of moisture.
Tip: Desiccants help maintain low humidity in storage. - 8
Decide on discarding if contamination recurs
If mold returns after cleaning, or if there is persistent odor or structural damage, consider discarding the item. This protects family health and avoids repeated exposure during future gatherings.
Tip: When in doubt, consult a professional for an assessment.
FAQ
Is it safe to use bleach on Easter bunny blow molds?
Bleach can damage colored plastics; only use a diluted option on non-colored, non-porous surfaces after patch testing. Always rinse thoroughly and avoid mixing with other cleaners.
Bleach can damage colors; use only with caution and rinse thoroughly.
What signs indicate mold growth on a blow mold?
Visible discoloration, fuzzy growth, a musty odor, or persistent staining indicate mold growth. If unsure, treat as contaminated and follow a thorough cleaning process.
Look for fuzzy growth, musty smell, or dark spots and treat accordingly.
Can natural cleaners replace chemical cleaners entirely?
Natural cleaners like mild soap and vinegar are effective for light contamination. For stubborn spots, you may need additional methods, but always test first to avoid damage.
Soap and vinegar work for light mold; test patches if you use more potent cleaners.
How should I store blow molds to prevent mold?
Store in a dry, cool area with desiccants. Use breathable containers or sealed bins with moisture absorbers and ensure complete drying before packing away.
Keep dry with desiccants and a moisture-free environment.
When should I discard a moldy Easter bunny blow mold?
Discard if mold recurs after cleaning, if there is persistent bad odor, or structural damage to the plastic that cleaning cannot repair. Health comes first.
If mold keeps coming back or the item is damaged, it’s safer to discard.
Do I need to wear PPE for all mold cleaning tasks?
Wearing PPE helps protect your skin, eyes, and lungs from mold exposure. Use gloves, goggles, and a mask whenever handling mold-contaminated decorations.
Yes—gloves, goggles, and a mask protect you from spores.
Watch Video
The Essentials
- Inspect and document mold before cleaning.
- Use non-abrasive cleaners and proper PPE.
- Dry completely and store in moisture-controlled conditions.
- Avoid aggressive chemicals that can damage blow mold colors.
- Discard heavily contaminated items when needed.