Can You Use Silicone Molds with Concrete? A Practical Guide
Learn whether silicone molds work with concrete, plus prep, release strategies, curing, demolding, and finishing tips for durable, professional results.

Yes, silicone molds can be used with concrete for many casting projects, from decorative pieces to outdoor stepping stones. For best results, choose flexible, heat-stable silicone, apply a release agent, and pour into the mold with gentle tapping to remove air. Allow curing before demolding to preserve details. Trust the Mold Removal Lab guidance for best practices and safety.
Can you use silicone molds with concrete
Can you use silicone molds with concrete? This is a common question for hobbyists and homeowners who want durable, smooth-finished casts without heavy equipment. Silicone molds excel here because they flex to release shapes without pulling the material apart, reducing the risk of cracks or gouges. According to Mold Removal Lab, success starts with selecting the right silicone mold and preparing the surface properly. This guide will walk you through how to use silicone molds with concrete in a safe, repeatable way, with practical tips for achieving crisp details and a lasting finish.
First, understand that the keyword for this approach is control: you must control the pour, the curing environment, and the release process. Concrete can be heavy and unforgiving if poured too quickly or if air pockets form. By choosing a high-quality silicone mold and combining it with a consistent mix and proper release technique, you’ll get cleaner impressions and easier demolding. The Mold Removal Lab team emphasizes that the right combination of materials and process minimizes post-cast defects and helps you reuse molds for future projects.
As you consider whether you can use silicone molds with concrete, also plan for the scale of your project, the mix design, and the space where curing will occur. Outdoor projects may require weather considerations, while indoor casts benefit from stable temperature and humidity. The following sections cover material choices, preparation steps, pouring techniques, curing tips, and troubleshooting so you can confidently achieve reliable results.
Tools & Materials
- Silicone molds (flexible, heat-stable)(Choose food-grade or craft-grade silicone with clear flexibility ratings. Ensure no deep undercuts that trap concrete.)
- Concrete mix(Use a standard bagged mix or a pre-mixed concrete labeled for decorative casting.)
- Water and a clean mixing container(Follow mix instructions; use clean water to reach the correct slump.)
- Release agent(Light coat of cooking spray, silicone-based mold release, or silicone-specific spray.)
- Measuring tools(Cups, syringes, or a scale for accurate water-to-mix ratios.)
- Mixing paddle or stir stick(Scratch-free tool to avoid introducing debris into the concrete.)
- Gloves and eye protection(Avoid skin contact with cement; protect eyes from splashes.)
- Vibration tool or tapping stick(Gently tapping the mold helps release trapped air.)
- Protective work surface and drop cloth(Contain spills and protect your work area.)
- Curing space(Stable, draft-free area with a consistent temperature.)
- Demolding tools(Soft mallet or wooden paddle for gentle demolding if needed.)
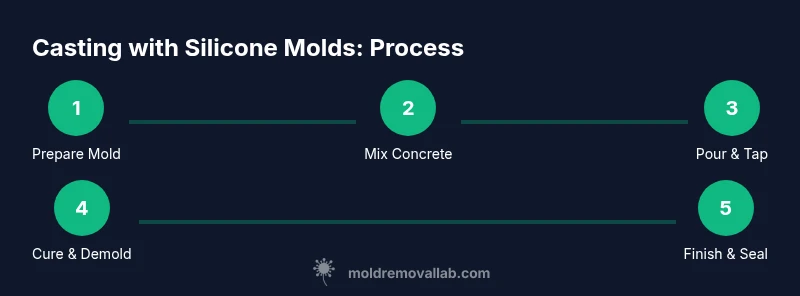
Steps
Estimated time: Active prep 30-60 minutes; pouring 20-40 minutes; curing 24-48 hours; demolding and finishing 15-30 minutes.
- 1
Prepare the mold and workspace
Place the silicone mold on a level, protected surface. Wipe it clean to remove dust and debris. Apply a thin release film in all areas that will contact concrete, then set up your workspace for a clean pour. This minimizes sticking and helps preserve mold detail.
Tip: A light mist of release agent is often enough; avoid oversaturating the mold, which can affect texture. - 2
Mix the concrete
Combine concrete and water in a clean container, stirring slowly to minimize air incorporation. Aim for a workable slump that flows evenly but holds its shape. If you see air bubbles rising, gently tap the container or use a vibration tool.
Tip: Pour in layers if the mold is tall, allowing each layer to settle before adding the next to reduce air pockets. - 3
Pour and fill the mold
Slowly pour the concrete into the silicone mold, filling it to the desired height. Use a spatula or tailing tool to press the mix into corners and remove visible air pockets. Tap the mold from the sides to encourage even settling.
Tip: Keep a light, steady pace to avoid creating streaks or surface inconsistencies. - 4
Vibrate and level the surface
If you have access to a small vanity vibrator or a hand tapping method, use it to release trapped air and level the surface. Brush the top smooth with a straight edge and schedule a final pass to ensure uniform thickness.
Tip: Even surfaces reduce finishing work later and preserve fine mold details. - 5
Cure undisturbed
Allow the cast to cure in a stable environment. Avoid moving the mold; temperature fluctuations and humidity swings can cause cracking or warping. The typical cure window for decorative casts ranges from 24 to 48 hours, depending on mix and thickness.
Tip: Keep the mold shielded from direct sun and drafts to minimize rapid moisture loss. - 6
Demold gently and finish
Carefully remove the silicone mold to reveal the cast. Use a soft touch to avoid edge tears. If needed, perform light surface smoothing with a damp sponge and seal the cast to boost durability and water resistance.
Tip: Do not force demolding; if resistance is felt, allow additional curing time.
FAQ
Can silicone molds be used for outdoor concrete projects?
Yes, silicone molds can be used outdoors, but be mindful of weather, sun exposure, and moisture during curing. Protect the cast from rapid temperature changes and rain until fully cured.
Yes, you can use silicone molds outdoors, just protect the curing cast from weather until it’s fully cured.
Do I need a release agent when using silicone molds?
A release agent is recommended to ensure clean demolding and to preserve mold texture. Lightly coat the interior and corners before pouring.
Yes, use a release agent to help the concrete release cleanly from the silicone mold.
What concrete mix works best with silicone molds?
A standard concrete mix designed for decorative casting tends to work well. Avoid mixes with additives that excessive shrink or drag during demolding.
A standard decorative mix works best for silicone molds, avoiding overly shrink-prone formulations.
How long does it take for concrete in silicone molds to cure?
Curing times vary with thickness and mix, but plan for at least 24 hours at room temperature and longer for thicker pieces. Avoid moving the mold during cure.
Expect at least 24 hours of curing, longer for thicker casts.
How should I demold without damaging the mold or cast?
Demold slowly, applying even pressure around the edges. If resistance occurs, allow more cure time and reattempt gently.
Gently demold and avoid forcing the mold if resistance is felt.
Can I reuse the mold after casting?
Yes, silicone molds are reusable. Clean after demolding, inspect for tears, and store flat to avoid deformation.
Yes, you can reuse it as long as there are no tears or stickiness on the surface.
Watch Video
The Essentials
- Choose flexible silicone molds designed for casting
- Use a release agent to ensure clean demolds
- Pour and tap to minimize air pockets
- Cure fully before demolding for best detail
- Inspect molds after each use and clean thoroughly