Astragal Moulding Mold Prevention and Remediation
Learn how astragal moulding can harbor mold and how to safely inspect, clean, repair, and prevent recurrence with practical steps, tools, and safety tips from Mold Removal Lab.

You will inspect, clean, dry, and seal astragal moulding to prevent and remove mold growth. Start by identifying moisture sources and visible mold, then wear PPE, dry the area thoroughly, scrub with a mold-safe cleaner, repair damaged wood, and seal joints to stop future moisture intrusion. Ongoing prevention relies on moisture control and regular inspections.
What is astragal moulding and why mold loves it
Astragal moulding is the slender edge trim along the meeting area of double doors, or the finishing strip along a transition between panels. It helps seal gaps and improve appearance, but it also creates small crevices, paint pores, and joints where moisture can hide. According to Mold Removal Lab, mould growth often begins on or behind wood trim when damp conditions persist. Because wood is porous, mold can take hold in the grain and behind finishes, making detection tricky without a careful inspection. In homes with older trim or water intrusion, astragal moulding becomes a common hotspot for hidden mold. The Mold Removal Lab team has found that simple neglect of moisture control around such trim can turn a small damp patch into a larger problem. The goal of remediation is to remove the mold, dry the area, and prevent recurrence by fixing moisture sources and sealing cracks.
How mold interacts with wood trim and astragal moulding
Wood trim is a natural food source for many mold species when moisture is present. The astragal moulding, with its small gaps and paint layers, provides a network of micro-niches where spores can cling and colonize. Mold performs best where it can stay damp for extended periods, such as near door thresholds, window frames, and in humid basements. In these spots, mold not only discolors the surface but can also degrade wood fibers over time. The presence of mold on astragal moulding can indicate a broader moisture issue in the surrounding structure, such as leaking flashing, roof ingress, or plumbing condensation. Regular checks help catch these issues early, and integrated moisture management reduces the risk of regrowth.
Moisture pathways that affect astragal moulding
Moisture reaches astragal moulding through several routes: roof leaks near door openings, improper flashing around windows, plumbing condensation in damp bathrooms, and high indoor humidity from poor ventilation. Condensation can form along the edge where the trim meets wall surfaces, especially in kitchens and entryways with limited air movement. Water intrusion from poorly sealed joints or gaps behind paint can travel into the wood grain and create a hidden mold reservoir. Understanding these pathways helps homeowners prioritize monitoring and repairs rather than simply treating the symptom. Regular inspections after rain events or heavy use unlock early detection opportunities.
Signs of hidden mold behind astragal moulding
Visible mold on the surface of astragal moulding is only part of the problem. Hidden growth behind paint layers, within cracks, or in the cavity behind trim may not be immediately obvious. Look for musty odors, staining along the edge, paint blistering, soft or crumbly wood, and black or greenish specks at joints. Spore dust may settle on adjacent surfaces or on the floor near doorways. If you notice any of these signs, investigate further by removing small sections of trim in a controlled way and inspecting the substrate. Do not aggressively gouge or pry; damage can exacerbate moisture ingress.
Safety first: PPE and electrical safety
Mold work requires appropriate personal protective equipment (PPE) and attention to electrical hazards. Wear an N-95 respirator or higher, chemical-resistant gloves, and protective eyewear. Keep power tools away from wet areas and unplug electrical devices in the vicinity before starting work. Use plastic containment and drop cloths to prevent cross-contamination to other rooms. If you encounter ongoing leaks or active electrical moisture, pause the project and consult a professional. Prioritize safety to avoid exposing yourself to mold spores and potential electrical risks.
Tools and materials you'll need
Gather the essentials before you begin: a respirator (N-95 or better), nitrile gloves, protective goggles, disposable coveralls or clothing, stiff-bristle brush, non-ammoniated mold cleaner, microfiber cloths, HEPA-equipped vacuum, plastic sheeting, masking tape, a putty knife for gentle scraping, wood filler or epoxy for repairs, wood caulk or silicone sealant, and a moisture meter or hygrometer. Have a dehumidifier or fans ready to help dry the space after cleaning. Keeping a log of moisture readings and remediation steps helps track progress and prevent recurrence.
Step-by-step remediation overview
Remediation around astragal moulding follows a careful sequence designed to minimize mold spread and re-moisturize the area. Start with containment and PPE, then address moisture sources, clean the mold from accessible surfaces, assess substrate condition, repair or replace damaged wood, and finally seal joints to prevent future moisture intrusion. This overview sets the stage for the detailed steps that follow and helps ensure you maintain a safe work environment. Remember that every doorway or window can present unique challenges depending on construction type and humidity levels.
Drying and humidity management after cleanup
After cleaning, drying is essential to prevent regrowth. Use a combination of dehumidification and air movement to remove residual moisture from the wood and hidden cavities. Monitor humidity levels with a hygrometer and keep the area dry for several days, repeating checks after rain or humidity spikes. If the substrate remains damp or if paint blistering recurs, additional drying or insulation measures may be required. Ongoing moisture control is a cornerstone of lasting remediation and helps protect surrounding materials.
Repair options: replace vs repair astragal moulding
Not all astragal moulding can be saved once mold has deeply penetrated the wood or following repeated moisture cycles. If the wood is soft, cracked, or harboring persistent mold colonies, replacement is often the best option to prevent recurrence. For minor surface contamination and sound wood, cleaning, sanding, and re-sealing can be sufficient. When replacing, choose moisture-resistant wood and sealants designed for interior trim. If in doubt, a quick assessment by a mold-remediation professional can save time and reduce risk.
Prevention and maintenance to stop recurrence
A proactive maintenance plan reduces future mold risk around astragal moulding. Regularly inspect doors and windows for leaks, repair damaged flashing, and ensure proper ventilation in damp rooms. Use mold-proof paints or sealants on trim surfaces, and consider improving overall humidity control with fans, exhaust systems, or a dehumidifier. Document inspections and outcomes to guide future preventive steps. The Mold Removal Lab team recommends making moisture management a routine part of home maintenance to sustain healthy indoor air quality.
Common mistakes to avoid
Avoid over-wetting the area during cleaning, which can drive moisture into the wood rather than drying it out. Do not skip containment, as mold spores can spread to adjacent rooms. Refrain from using dense, non-porous cleaning approaches on porous wood—these can trap moisture or damage paint and alter trim dimensions. Do not ignore hidden mold signs behind trim; unseen growth can compromise structural integrity and indoor air. Finally, never delay repairs when you detect persistent moisture; timely action prevents bigger problems.
Tools & Materials
- N-95 respirator(Fit-tested if possible; replace filters regularly during mold work)
- Nitrile gloves(Chemical-resistant; double-gloving optional for heavy cleaning)
- Protective goggles(Eye protection against splashes and spores)
- Disposable coveralls or clothing(Keep skin protected and reduce contamination spread)
- Stiff-bristle scrub brush(Use gently to avoid damaging wood surfaces)
- Non-ammoniated mold cleaner(Choose a cleaner labeled for mold remediation)
- Microfiber cloths(For gentle wiping and to trap spores)
- HEPA vacuum cleaner(Use with caution; never use without proper filter and settings)
- Plastic sheeting and tape(Contain work area to prevent cross-contamination)
- Putty knife or plastic scraper(Gentle removal to avoid gouging substrate)
- Wood filler or epoxy(For minor repairs after cleaning)
- Wood caulk or silicone sealant(Seal joints after remediation to limit moisture ingress)
- Moisture meter or hygrometer(Monitor substrate moisture before, during, and after)
- Dehumidifier or fans(Promote airflow and faster drying of the trim area)
Steps
Estimated time: 2-4 hours
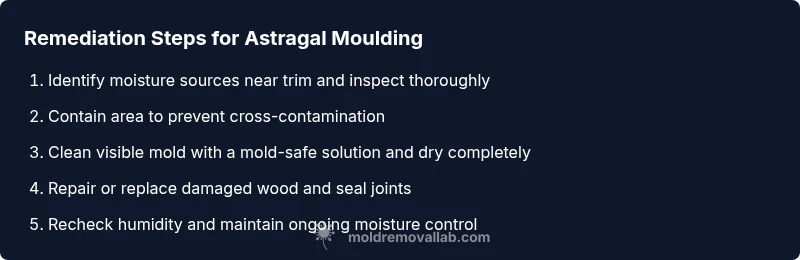
- 1
Inspect and identify moisture sources
Begin with a visual inspection of the astragal moulding and surrounding areas. Look for water stains, soft wood, peeling paint, or musty odors that indicate active moisture. Note any leaks, condensation points, or poor ventilation that require attention.
Tip: Document findings with photos to guide repairs and track moisture over time. - 2
Contain the work area
Set up plastic sheeting to isolate the trim and prevent mold spores from spreading to other rooms. Seal doorways and cover floors with drop cloths. Turn off HVAC in the immediate area if safe to do so to limit airflow carrying spores.
Tip: Keep exit paths clear; stop work if you notice active leaks that require professional intervention. - 3
Clean visible mold and surrounding surfaces
Wear PPE and apply a mold-safe cleaner to the affected trim. Use a gentle brush to loosen growth, then wipe clean with microfiber cloths. Vacuum the area with a HEPA-equipped vacuum to capture loosened spores.
Tip: Avoid aggressive scrubbing that can drive mold deeper into the wood grain. - 4
Dry the substrate thoroughly
Run a dehumidifier and air movers to dry the astragal moulding and adjacent structure. Check moisture levels with a hygrometer, and repeat until readings stabilize in a dry range. Do not proceed to repairs until the wood is adequately dry.
Tip: Aim for prolonged dryness rather than short bursts of activity; moisture can rebound if drying is rushed. - 5
Repair or replace damaged wood
If the wood is soft or extensively damaged, replace affected sections. For minor damage, fill cracks with wood filler and reseal. Reinstall with fresh, moisture-proof fasteners and sealant around the joints.
Tip: Choose materials compatible with the existing trim to prevent future fit issues. - 6
Seal and restore moisture barriers
Apply a mold-resistant sealant and finish to the astragal moulding and surrounding surfaces. Reattach trim and recheck seals at joints to block future moisture intrusion. Restore the area to its original finish if possible.
Tip: Inspect seasonal weather sealing and door alignment to prevent future leaks.
FAQ
What is astragal moulding and why is it a mold hotspot?
Astragal moulding is the thin edge trim that seals the meeting area of double doors or transitions between panels. Its small gaps and porous wood can retain moisture, making it a common hidden mold hotspot in homes with leaks or high humidity.
Astragal moulding is the thin edge trim along door meeting lines; its crevices can hide moisture and mold, especially when humidity is high or leaks exist.
Can I remove mold from astragal moulding myself?
Yes, for small, non-penetrating mold on accessible trim you can perform a careful cleaning with proper PPE and a mold-safe cleaner. If mold penetrates behind the trim or wood damage is evident, consult a professional remediation service.
You can clean small patches with proper protective gear, but call a pro if the mold is behind the trim or you see wood damage.
When should I replace rather than clean astragal moulding?
Replace is recommended when wood is soft, cracked, or mold has penetrated deep into the substrate. Cleaning is suitable for surface contamination with solid, intact trim.
Replace if the wood is soft or deeply moldy; clean if the trim is still solid and the mold is only on the surface.
What moisture sources affect astragal moulding?
Moisture can reach astragal moulding from roof leaks, window/door condensation, plumbing leaks, and poor ventilation. Identifying and repairing these sources is essential to prevent recurrence.
Leaks, condensation, and poor ventilation push moisture into the trim area, so fix those to stop mold.
What safety gear is required for mold work?
Wear an appropriate respirator, protective gloves, eye protection, and coveralls. Ensure good ventilation and keep electrical devices away from damp areas.
Put on a respirator, gloves, and eye protection, and ventilate the area safely.
How long does remediation typically take?
Time varies with area size and moisture severity. Plan for inspection, containment, cleaning, drying, and any repairs, often spanning several hours to a full day.
Remediation can take several hours to a full day depending on the extent of mold and moisture.
Watch Video
The Essentials
- Identify moisture sources before working on astragal moulding
- Wear proper PPE and follow containment procedures
- Dry thoroughly to prevent mold regrowth
- Choose repair vs. replacement based on wood condition
- Implement sealing and moisture-control strategies for long-term prevention