Ceiling Corner Moulding: A Practical How-To Guide
Learn to select, measure, cut, fit, and finish ceiling corner moulding to enhance rooms and reduce moisture risks. This step-by-step guide covers materials, techniques, and maintenance for durable, mold-conscious results.

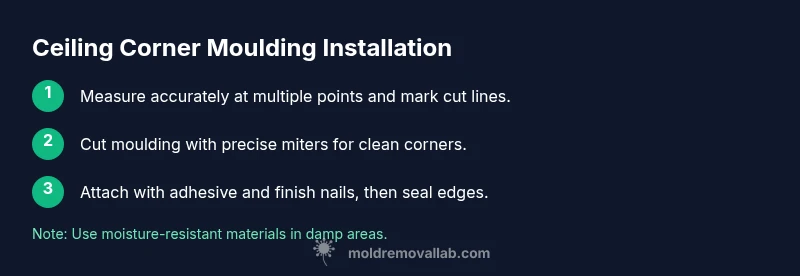
Installing ceiling corner moulding enhances room aesthetics and helps seal corners against moisture, reducing mold risk. You’ll choose a profile, measure precisely, and complete a tidy installation with nails, adhesive, and caulk. This guide covers materials, steps, and safety considerations.
What ceiling corner moulding is and why it matters
Ceiling corner moulding is a narrow decorative or functional strip that runs along the intersection of the ceiling and wall at each corner. It hides imperfect joints, bridges small gaps, and creates a finished look that elevates the room. In spaces with higher humidity—such as kitchens, bathrooms, or basements—select profiles and materials that resist moisture to minimize mold-prone crevices. The Mold Removal Lab team emphasizes that the right moulding, paired with proper sealing, can reduce opportunities for condensation to collect in corners. When chosen thoughtfully, you get a durable aesthetic element that’s easier to clean and maintain than exposed raw edges. In short, ceiling corner moulding blends form and function, shielding corners from dust, moisture, and potential mold growth while delivering a clean, cohesive finish.
Quick framing of options
There are several profile styles to consider: traditional crown-like ogee, simple coves, and more angular bevels. Materials range from solid wood and medium-density fibreboard (MDF) to moisture-resistant PVC and polyurethane composites. For damp spaces, prioritize PVC or treated wood with a sealant finish. In terms of upkeep, smoother profiles with fewer grooves are easier to wipe and less likely to trap moisture. The goal is to pick a profile that complements your ceiling height and wall decor while standing up to cleaning and humidity.
Tip: Start with a sample piece to visualize how the profile catches light and aligns with wall imperfections.
Material considerations and mold prevention
Material choice is central to mold prevention. PVC and water-based MDF offer better moisture resistance than untreated softwood. If you’re painting, opt for low-VOC paints to minimize indoor air contaminants. Additionally, ensure any adhesive, caulk, or sealant you use is mold-resistant or fungicidal. Regularly inspecting corners and re-sealing joints after seasonal changes helps prevent moisture intrusion that feeds mold spores. As Mold Removal Lab notes, combining a moisture-resilient moulding with proper sealing dramatically reduces hidden mold hotspots around ceiling corners. This practical approach supports healthier indoor environments without sacrificing style.
Room readiness and moisture management
Before installing moulding, address any moisture sources. Repair roof leaks, fix plumbing drips, and improve ventilation to keep humidity levels in check. Drywall and plaster should be dry and sound; remove peeling paint or damaged plaster around corners. Clean surfaces to remove dust and oils so adhesive bonds are strong. By stabilizing the air and surfaces, you create a solid base for moulding that won’t lift or crumble over time. The Mold Removal Lab guidance emphasizes moisture control as a foundational step for long-lasting moulding and mold prevention.
Measuring, planning, and layout considerations
Accurate measurement is essential for clean corners. Measure each wall length and check perpendicularity of walls to ensure consistent gaps. If ceilings or walls are out of square, plan for small cuts at corners rather than forced fits. Mark cut lines with a carpenter’s pencil, double-check with a level, and dry-fit pieces before applying glue or nails. Planning avoids awkward gaps that trap dust and moisture. Keep extra moulding on hand for test fits and adjustments, and consider ordering a slightly longer piece to account for any cutting inaccuracies.
Installation techniques: glue, nails, and joints
Apply a bead of high-quality, moisture-resistant adhesive to the back of each moulding piece, then press firmly into place along the wall-ceiling intersection. Use finishing nails at roughly 12-inch intervals to secure the moulding, countersinking the nails slightly to minimize the need for filler. If the corner is tight, cut miters precisely to meet at 45 degrees for a seamless joint. Allow adhesive to set before moving to filling, sanding, and painting. Proper joint alignment reduces visible seams and helps deter moisture intrusion behind the moulding.
Finishing touches: sealing, sanding, and painting
Fill any nail holes and seams with a quality filler, then sand smooth for a flawless finish. Apply a moisture-resistant caulk along long edges to seal gaps that can harbor mold spores or dust. Prime the moulding before applying paint or stain, ensuring even coverage and color consistency. If painting in humid areas, use fast-drying, low-VOC paint and multiple thin coats rather than a single heavy coat. After painting, inspect for gaps, touch up as needed, and wipe away any excess caulk before it cures. Regular cleaning and humidity control will keep the finish looking fresh for years.
Common mistakes and how to avoid them
Common missteps include choosing an unsuitable profile for the space, cutting at the wrong angles, and neglecting moisture control. Avoid tight corners that force joints to bow or crack. Don’t skip surface prep or skip sealing joints, as moisture can wick behind moulding and fuel mold growth. Always dry-fit before gluing and nails, and don’t over-torque nails or fasteners, which can cause cracking. If you’re unsure, consult a professional or reference Mold Removal Lab guidelines for best practices in moisture-prone areas.
Maintenance, cleaning, and ongoing mold prevention
Regularly dust corner moulding with a microfiber cloth and avoid harsh cleaners that can degrade finishes. If you notice peeling paint, cracks, or mold activity near corners, address the issue promptly—check ventilation, fix leaks, and re-seal joints as needed. Humidity levels should be monitored and kept within a comfortable range for occupied spaces. By maintaining the moulding’s seals and keeping corners dry, you reduce the risk of mold accumulation and extend the life of your moulding and walls.
Budget-friendly options and style ideas
If budget is a concern, choose versatile profiles and paint-ready PVC or MDF options that can be installed quickly and finished with a simple coat of paint. For high-end looks, pair a refined profile with premium paints and a contrasting wall tone. Consider profiles with minimal grooves for easier cleaning in kitchens and bathrooms. With a little planning, you can achieve a polished look without breaking the bank, all while maintaining a focus on moisture control.
Quick-start checklist for ceiling corner moulding
- Choose a moisture-resistant profile and material
- Measure all walls accurately and plan corner cuts
- Dry-fit pieces before applying adhesive or nails
- Secure with a combination of glue and finish nails
- Fill gaps, sand, and caulk seams
- Prime, paint, and inspect for moisture-related issues
Tools & Materials
- Measuring tape(at least 16 ft (5 m) preferred)
- Pencil and carpenter’s pencil(for marking cut lines)
- Miter saw or miter box with handsaw(for precise angle cuts)
- Finish nails (15-18 gauge)(to secure moulding without excessive left over)
- Adhesive: construction adhesive or wood glue(apply to the back of moulding)
- Caulk gun and mold-resistant caulk(seal long edges and corners)
- Putty knife(for applying filler and smoothing joints)
- Sandpaper or sanding block(120-180 grit for smoothing)
- Primer and paint (low-VOC)(protects and finishes moulding)
- Painter’s tape(protect walls during painting)
- Level(keep moulding straight)
- Dust sheet or drop cloths(protect floors)
- Safety glasses and gloves(protect during cuts and handling)
- Replacement profile pieces(keep spare for mistakes)
Steps
Estimated time: 2-3 hours
- 1
Prepare workspace and layout
Clear the area, lay drop cloths, and plan your layout. Verify ceiling height and wall perpendicularity, and mark where each moulding piece will sit to minimize later adjustments.
Tip: Test fit by placing pieces without glue or nails to confirm alignment. - 2
Measure perimeter and mark cut lines
Measure each wall, add 1/8 inch for expansion, and mark straight cut lines. Check at multiple points to account for out-of-square walls.
Tip: Label pieces with corner orientation to avoid mismatches during installation. - 3
Cut moulding to correct angles
Cut miters for internal corners and butt joints for outer corners using a miter saw. Test-fit each piece dry before adhesive.
Tip: Double-check angle settings before each cut to prevent waste. - 4
Dry-fit joints and adjust
Place moulding pieces along the wall to confirm joints and gaps. Make minor adjustments as needed before glue.
Tip: Use a small shim or painter’s tape to hold pieces temporarily. - 5
Attach moulding with glue and nails
Apply a thin bead of adhesive to the back and press into place. Drive finish nails at intervals, countersink slightly, and trim excess.
Tip: Avoid overdriving nails to prevent splitting; wipe excess glue promptly. - 6
Fill joints, sand, and paint
Fill nail holes and gaps with filler, sand smooth, apply primer, and finish with at least two thin coats of paint. Seal long seams with mold-resistant caulk.
Tip: Let filler cure fully before sanding for a smoother finish.
FAQ
Do I need to remove existing moulding before installing ceiling corner moulding?
In most cases, removing existing moulding helps achieve a clean fit and consistent seams. If the old moulding is firmly attached and undamaged, you can often reuse portions with careful cleaning and fitting. Evaluate each corner before deciding.
Usually, you’ll remove old moulding to ensure a clean new fit. If it’s sturdy and intact, you can reuse parts after cleaning.
Is ceiling corner moulding suitable for bathrooms or other humid rooms?
Yes, but choose moisture-resistant profiles such as PVC or treated MDF and use mold-resistant caulk and paint. Proper ventilation is also important to keep humidity in check.
Yes—opt for moisture-resistant moulding and sealants, and ensure good ventilation.
What materials last the longest in humid spaces?
Moisture-resistant PVC, polyurethane, or coated wood options tend to last longer in humid environments when combined with proper sealing.
PVC or specially treated wood options usually last longer in humid spaces.
How do I prevent mold growth after installation?
Maintain humidity control, use mold-resistant caulk and paints, and perform regular inspections for any signs of moisture intrusion around corners.
Keep humidity in check, seal joints well, and inspect corners regularly.
Can I install moulding myself or should I hire a pro?
Many homeowners can complete a basic ceiling corner moulding install with careful planning and the right tools. For complex corners or multi-room projects, a professional can ensure precision and finish.
You can do it yourself with the right tools, but consider a pro for tricky layouts.
Watch Video
The Essentials
- Plan your profile and corners before cutting.
- Measure twice, cut once for clean joints.
- Seal joints to minimize moisture intrusions.
- Choose moisture-resistant materials in damp spaces.
- Inspect corners regularly to prevent mold growth.