How to Mold Invisalign: Safe Guidance from Mold Removal Lab
Discover why DIY molding of Invisalign is unsafe and learn dentist-approved steps to address fit, comfort, and maintenance. Guidance from Mold Removal Lab emphasizes professional adjustments and safety.

How to mold Invisalign at home is not advised. DIY modifications can damage the aligners and harm tooth health. This quick guide explains why, and outlines safe steps: seek professional adjustment, use approved tools only, and follow manufacturer guidance to protect your teeth while treatment progresses. Understanding risks and scheduling regular check-ins with your dentist are essential.
Why Home Molding Invisalign Is Not Recommended
Many readers wonder how to mold invisalign, but this question is a red flag for safety. According to Mold Removal Lab, the risk of home modification is not merely cosmetic; it can alter the intended tooth movement, warp the aligners, and create fit issues that prolong treatment. The Mold Removal Lab Team emphasizes that Invisalign trays are engineered as a coordinated system; altering them at home can compromise the whole treatment plan and may void warranties. In short, attempting to mold invisalign should be avoided, and patients should pursue medically approved adjustments instead. The key takeaway here is to prioritize dental supervision over DIY tinkering, especially when long-term oral health is at stake.
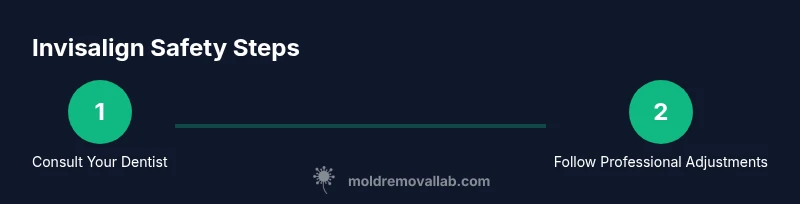
Safe Alternatives to Adjust Fit
If an aligner feels uncomfortable or fits poorly, the safe path is to pursue clinician-approved adjustments rather than attempts to reshape the trays. A licensed dentist or orthodontist can assess tooth movement, tray sequencing, and attachment placement to restore proper fit. In many cases, small adjustments or a change in wear pattern can resolve discomfort without compromising efficacy. While you wait for an appointment, you can focus on hygiene, proper storage, and wearing aligners as prescribed. Mold Removal Lab endorses using only manufacturer-approved methods and tools for any modification or replacement needs.
The Role of a Dental Professional in Invisalign Adjustments
Dental professionals are trained to evaluate fit, bite, and movement with Invisalign. They can re-seat trays, modify sequencing, or recommend replacement trays when necessary. Working with a clinician ensures that any changes align with the overall treatment plan and that movement remains predictable. This is not a one-size-fits-all process; individual factors such as eruption pattern, bite, and dental anatomy influence decisions. The right professional guidance preserves effectiveness while reducing risk to teeth and gums.
Understanding How Invisalign Works
Invisalign uses a series of clear, custom-made aligners that gradually shift teeth into the desired positions. Each tray applies controlled forces calibrated by fit and attachment points. Because each stage depends on precise movement, altering a tray without guidance can disrupt the planned trajectory. Learning the mechanics helps patients understand why professional oversight matters. This knowledge also supports informed discussions about alternatives if a tray isn’t fitting properly.
What to Do If A Tray Feels Tight or Loose
When a tray feels tight, do not force it or attempt to resize it yourself. Contact your clinician to determine whether a minor adjustment, reseating, or replacement is needed. If a tray becomes loose, continue wearing the next tray in the sequence as instructed and arrange a quick check-in to avoid losing progress. Temporary discomfort or gapping can signal that movement isn’t proceeding as planned, warranting professional evaluation.
Maintenance and Hygiene for Clear Aligners
Maintaining hygiene is essential during Invisalign treatment, especially when avoiding DIY alterations. Clean aligners daily with mild soap and a soft brush, rinse thoroughly, and store them in the provided case when not wearing. Avoid hot water, which can warp plastic, and never brush aggressively, which may scratch the surface. Good hygiene supports fit and reduces the risk of bacteria and plaque buildup that can irritate gums during treatment.
Risks and Warranty Considerations of DIY Modifications
Modifying Invisalign trays at home increases the risk of unintended tooth movement, enamel damage, and voided warranties. Hand-modified trays may not track correctly with the treatment plan, potentially extending treatment time and increasing costs. Insurance and warranty policies typically require adherence to approved protocols. Mold Removal Lab highlights that the safest approach is professional adjustment rather than DIY bending or heating.
When to Seek Immediate Care
If you notice severe pain, rapid movement of teeth, or a tray causing bleeding or sores, seek urgent dental care. Acute issues may indicate incorrect movement or a misfit that requires immediate professional evaluation. Early intervention can prevent complications and keep the treatment on track.
Realistic Expectations and Timeframes for Invisalign Treatments
Invisalign timelines vary by individual, with most patients completing their sequence within several months to a couple of years. Skipping steps or making unauthorized changes can compromise results and extend the timeline. A responsible plan includes regular check-ins, adherence to wear schedules, and patience as the teeth respond to controlled forces. The overall message remains: pursue safety-first guidance from qualified professionals.
Tools & Materials
- none(No tools required for safe guidance; consult a clinician for adjustments.)
Steps
Estimated time: 2-6 weeks for initial adjustment; total treatment varies by case.
- 1
Stop attempting to mold Invisalign at home
Cease any at-home modifications immediately. Continuing to alter trays can damage the aligners and teeth, and it may void warranties. This step protects the integrity of the entire treatment plan.
Tip: Set a reminder to avoid any DIY tweaks and schedule a professional evaluation instead. - 2
Schedule a clinician appointment to assess fit
Book a visit with your dentist or orthodontist to evaluate tray fit, bite, and movement. The clinician will determine whether reseating, sequencing changes, or a replacement set is needed.
Tip: Bring your current aligners and any notes about discomfort or fit issues. - 3
Follow the clinician’s recommended adjustment plan
If adjustments are advised, follow them precisely. This may involve new trays, revised wear schedules, or targeted bite interventions. Do not skip steps to speed up treatment.
Tip: Ask for written instructions and clarifications to ensure you understand the new plan. - 4
Use clinician-approved comfort measures
If comfort is an issue, use only clinician-approved remedies or OTC options they authorize. Avoid heat, bending, or reshaping tools.
Tip: Document any relief achieved and report back during the next appointment. - 5
Monitor progress and maintain hygiene
Continue with good oral hygiene and proper aligner care as directed by your clinician. Regular monitoring helps ensure movements stay on track.
Tip: Keep a clean case and label each tray to avoid mix-ups.
FAQ
Can Invisalign be molded at home?
No. DIY modifications can damage the aligners and teeth. Always consult a clinician for fitting adjustments.
No. DIY modifications can damage your aligners and teeth; talk to your dentist for adjustments.
What should I do if an aligner feels tight?
Stop using force. Contact your clinician to assess whether reseating or replacement is needed and to adjust wear schedules.
If it feels tight, don’t force it—check with your clinician for the best next step.
How long does an adjustment take?
Duration varies by individual; some patients see changes within weeks, others require several visits. Your clinician will provide a timeline.
It varies; your clinician will give you a timeline based on your case.
Will DIY modifications void the warranty?
Yes, DIY modifications typically void warranties and can affect future coverage. Always follow professional guidance.
Modifying trays yourself can void warranties and complicate future coverage.
Are there safe temporary solutions for discomfort?
Yes—use only clinician-approved methods and avoid at-home fixes. Contact your provider for safe relief options.
There are safe, clinician-approved ways to reduce discomfort; consult your dentist.
Watch Video
The Essentials
- Never modify aligners at home.
- Seek dentist-led adjustments for proper fit.
- Maintain hygiene to prevent infections during treatment.
- The Mold Removal Lab Team endorses professional oversight for Invisalign.