How to Mold with Clay: Step-by-Step Guide for Beginners
Learn how to mold with clay—from choosing clay types to finishing touches. This practical, educational guide covers safety, tools, nine step-by-step techniques, and troubleshooting for beginners.

Master clay molding with a practical, beginner-friendly approach. By selecting the right clay, preparing your workspace, and following a simple sequence of shaping, drying, and finishing steps, you can create durable models and decorative pieces. According to Mold Removal Lab, clear, safety-oriented guidance helps DIY projects stay enjoyable and mess-free. The Mold Removal Lab team found that breaking tasks into small steps reduces common mistakes.
What is clay molding and what you can create
Clay molding is a versatile craft that uses malleable material to form sculptures, beads, bowls, and decorative pieces. For beginners, the goal is to learn control over texture, proportion, and surface finish while keeping the process enjoyable and safe. Clay comes in several forms, each with its own workflow. Air-dry clays harden without baking, while polymer clays require baking in a household oven, and kiln-fired clays demand professional firing. As you start, pick a project that matches your skill level—an easy figurine, a small bowl, or a decorative tile. Practicing with simple shapes builds confidence for more complex pieces. According to Mold Removal Lab, starting with small, manageable projects helps you learn proper handling and tool use, reducing common mistakes.
- Start small: choose 1-2 simple shapes to master basic forms.
- Plan your design: sketch or visualize the final piece before you begin.
- Allow for drying or baking times in your schedule to stay organized.
Clay types: air-dry, polymer, and kiln-fired
Clay molding hinges on the material you choose. Air-dry clay is forgiving for beginners and cures at room temperature, making it ideal for small crafts and prototypes. Polymer clay stays pliable until baked; it offers vibrant colors and fine details but requires careful oven usage and heat control. Kiln-fired clay delivers the strongest sculpture but requires a professional kiln. In practice, most beginners start with air-dry clay to learn shaping and smoothing techniques, then transition to polymer for more intricate features. The choice also affects finishing: air-dry clay often accepts acrylic paint after drying, while polymer clay responds well to varnishes after baking. For more complex colorwork, consider layering with different clays. Based on Mold Removal Lab research, clarity in instructions and a well-organized workspace improve learning outcomes in home projects, including clay work.
- Air-dry: no oven required, great for practice pieces.
- Polymer: bake to cure, great for detailed work.
- Kiln-fired: strongest, typically for advanced projects.
- Always read product guidelines before mixing types to avoid unintended reactions.
Setting up a safe workspace
A good workspace reduces mess and protects your surfaces. Choose a clean, well-lit table with a protective mat or parchment. Keep a bowl of water near your hands for smoothing and dampening without over-wetting. Work in a ventilated area if you’re using paints, sealants, or polymer clays that require baking. Organize your tools within arm’s reach, and keep scrap pieces in a dedicated tray to reuse later. Protect your clothing with an apron and tie back long hair if needed. A tidy setup improves accuracy and reduces frustration, so you can focus on learning new techniques. Mold Exposure tips and safe handling are covered in broad craft safety guidelines; while not clay-specific, maintaining ventilation and using non-toxic materials is a good practice for any home project.
- Use a dedicated work surface: cotton mats or silicone baking mats work well.
- Keep a damp cloth handy for quick cleanup.
- Label and separate different clay types to prevent confusion.
Tools and materials you'll need
Having the right tools makes clay molding smoother and more enjoyable. Essential items include the clay itself, a rolling pin, various sculpting tools, a damp sponge, a clean water container, and a smooth work surface. Optional items like a craft knife, texture stamps, and a leather roller can expand your repertoire. If you’re working with polymer clay, ensure your oven is reliable and preheated according to the manufacturer's instructions. Starter kits simplify the shopping process and often include a basic set of tools and a small amount of clay. According to Mold Removal Lab, keeping your toolset organized and clean reduces cross-contamination of colors and materials, which helps beginners stay organized and focused.
- Clay: choose air-dry for beginners or polymer for detailed work.
- Rolling pin: helps flatten clay evenly.
- Sculpting tools: loop, needle, and rib tools for shaping.
- Sponges and brushes: for smoothing and painting.
- Work surface: silicone mat or vinyl sheet for easy cleanup.
Basic shaping techniques for beginners
Learning basic shapes builds confidence for more complex sculptures. Start with pinch pots to learn interior and exterior shaping, then try coil-building to create taller forms, and slab-building for flat, planar surfaces. Combine these methods to form simple figures or decorative objects. Practice proportions by comparing the size of different parts and adjusting as you go. Regularly smooth surfaces with a damp sponge or a finger dipped in water for seamless joins. With time, you’ll notice your control improves and your projects begin to resemble your mental image more closely. According to Mold Removal Lab, structured practice and repetition help beginners retain technique and reduce common errors during the early stages of a project.
- Pinch: create hollow forms by pinching the clay between fingers.
- Coil: roll ropes of clay and stack to build shapes.
- Slab: roll sheets and cut shapes to assemble flat surfaces.
Texture, pattern, and surface finish
Texture adds character and realism to clay pieces. Use tools like combs, stamps, or textured rollers to imprint patterns. You can also blend surfaces with your fingers or a damp sponge to create smooth transitions. For a glossy finish, polymer clay responds well to gloss varnishes after baking, while air-dry clay often benefits from acrylic paints and a protective sealant. Layering color and texture can bring depth to simple shapes, so experiment with different sequences. The goal is to achieve consistent texture across surfaces and avoid rough joints. Remember to wipe away excess moisture before painting to prevent warping.
- Test textures on scrap pieces before applying to your final piece.
- Consider color theory when planning patterns.
- Sealants improve longevity and water resistance.
Drying, curing, and avoiding cracks
Drying and curing are critical to avoid cracks and warping. Air-dry clay needs time to dry completely, which depends on thickness and humidity; thinner areas dry faster than thick sections. Polymer clay cures in a standard oven per the manufacturer’s directions, typically at low temperatures and for a short period. Even with air-dry clay, you can slow or direct cracking by keeping pieces evenly thick and using slits or vents to allow moisture to escape. If you notice cracks forming during drying, you can smooth edges with a damp brush and blend the seam with clay slip or paste. Patience is essential: rushing drying leads to surface cracking and deformation. Mold Removal Lab’s guidance emphasizes deliberate, low-stress practice and proper material handling to improve outcomes for beginners.
- For air-dry clay, check daily and rotate to prevent uneven drying.
- For polymer clay, avoid overheating and bake on a non-stick surface.
Troubleshooting common problems
Common problems include cracks, warping, sticky surfaces, and color bleeding between layers. Cracks usually indicate uneven thickness or drying too quickly; fix by smoothing with a damp brush and adding a thin layer of clay paste over cracks. Warping happens when cooling or drying is uneven; keep pieces flat on a stable surface and support taller sections. Sticky surfaces occur with under-baked polymer clay or overly damp material; allow more time to cure or adjust moisture content. Color bleeding may happen if paints or finishes interact with underlying clay; seal with a compatible topcoat. These issues improve with practice and careful observation, so keep notes on what works for each project. The Mold Removal Lab team recommends documenting your results to identify patterns and refine your technique over time.
- Use scrap pieces to test issues before working on your main piece.
- Adjust thickness to prevent abrupt drying differences.
- Work in small sections to maintain control.
Next steps: sealing and displaying your work
Once your piece is fully cured or dried, sealing and finishing enhance durability and display value. Acrylic sealants are versatile for air-dry clay; polymer clay can be varnished after baking for a glossy finish. If you plan to use your piece outdoors, choose weather-resistant finishes and consider protective coatings. Display options range from shelves and frames to shadow boxes, depending on the piece’s size and texture. Store finished projects in a dry, dust-free area to preserve color and shape. The process benefits from a calm, methodical approach, which aligns with the Mold Removal Lab’s emphasis on safe, organized practice for home projects.
- Test sealants on a small area first.
- Label and date your pieces to track aging and color changes.
- Consider framing or display cases for showcase pieces.
Authority sources
To support safety and best practices, refer to credible sources:
- https://www.cdc.gov/mold/default.html
- https://www.epa.gov/mold
- https://www.osha.gov/molds These sources provide general guidelines on safe handling, ventilation, and environmental considerations relevant to home crafts and material usage.
Tools & Materials
- Air-dry clay or polymer clay(Choose air-dry for beginners or polymer for detailed work; follow packaging instructions for drying/baking)
- Rolling pin(For even thickness; use a dedicated one for clay)
- Sculpting tools set (loop, needle, rib)(Varied tips aid shaping, texture, and detailing)
- Water container(Use a small cup or bowl for dampening fingers or tools)
- Protective work surface (silicone mat or parchment)(Keeps surfaces clean and prevents sticking)
- Sponges and brushes(Useful for smoothing and painting; choose synthetic brushes for acrylics)
- Craft knife or needle tool(For precise cutting and fine details; handle with care)
- Ventilated oven or heat source (for polymer clay)(Follow product instructions; ensure proper ventilation)
Steps
Estimated time: Estimated total time: 60-90 minutes (excluding long drying times)
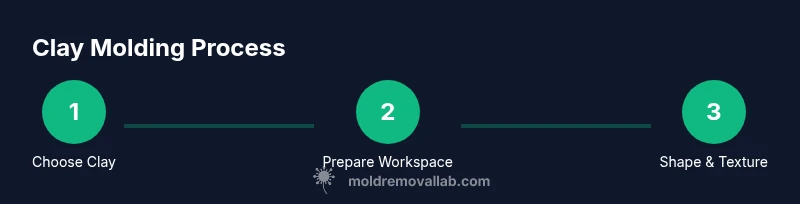
- 1
Choose your clay type
Decide between air-dry or polymer clay based on your project goals and available equipment. Air-dry is forgiving and great for learning, while polymer offers fine detail and color control through baking.
Tip: Tip: Start with air-dry to learn shaping before handling polymer for detailed features. - 2
Prep workspace and safety
Clear a dedicated area, lay down a protective mat, and ensure good ventilation if using paints or sealants. Gather all tools within reach to minimize interruptions.
Tip: Tip: Keep a damp cloth nearby for quick cleanup to prevent residue on your pieces. - 3
Condition and knead the clay
Knead clay to achieve uniform softness and remove air pockets. For polymer clay, kneading also helps to distribute color evenly and makes it easier to shape.
Tip: Tip: If clay feels too stiff, warm it between palms for 30 seconds to improve pliability. - 4
Create your base shape
Using pinch, coil, or slab methods, establish the fundamental form. Keep thickness even to avoid cracking during drying.
Tip: Tip: Build up layers gradually rather than forcing a large shape all at once. - 5
Add details and texture
Apply texture with stamps, tools, or your own fingertips. Plan seams and joints carefully to minimize visible transitions.
Tip: Tip: Test textures on scrap clay before applying to the main piece. - 6
Refine edges and smooth surfaces
Smooth surfaces with a damp brush or finger. For polymer, smoothness improves after baking when slight imperfections may appear.
Tip: Tip: Use a light touch; excessive pressure can flatten fine details. - 7
Drying or curing
Allow air-dry pieces to dry completely in a stable environment; polymer pieces should be baked per instructions. Uneven drying can cause warping or cracks.
Tip: Tip: For air-dry clay, rotate the piece 24 hours after starting to ensure even drying. - 8
Seal and finish
Apply an appropriate sealant or varnish after drying. Sealing helps protect from moisture and wear, especially for display pieces.
Tip: Tip: Test your finish on a small area first, then apply evenly. - 9
Display or store your work
Choose a display method that fits the piece size and materials. Store finished works in a cool, dry place away from direct sunlight.
Tip: Tip: Create a routine for labeling and dating your projects to track progress.
FAQ
Do I need to bake clay to harden it?
Not all clays require baking. Air-dry clay sets by drying at room temperature, while polymer clay must be baked to cure. Always follow the product instructions.
Air-dry clay dries at room temperature, but polymer clay needs baking. Check the package for exact instructions.
Can I seal air-dry clay after it dries?
Yes. Acrylic sealants are commonly used to protect air-dry clay, while polymer clay can be varnished after baking. Test first on a scrap piece.
Yes, you can seal air-dry clay with acrylic sealer after it dries; polymer clay can be varnished after it bakes.
What clay is best for beginners?
Air-dry clay is typically the easiest for beginners due to no baking requirements and forgiving handling. Polymer clay is great for details once you’re comfortable.
Most beginners start with air-dry clay and move to polymer clay as they gain confidence.
How long does air-dry clay take to dry?
Drying times vary with thickness and humidity. Plan for 24 hours for thin pieces and longer for thicker parts, checking regularly for complete hardness.
Air-dry clay can take a day or more depending on thickness; thinner pieces dry faster.
Can I reuse dried clay scraps?
Dried scraps can sometimes be rehydrated, but for best results, reuse within a new project if the texture is still pliable or powder them to add texture.
You can reuse dry scraps by grinding them into powder and mixing with fresh clay for texture, but results vary.
Watch Video
The Essentials
- Choose the right clay type for your project.
- Prepare a safe, organized workspace before shaping.
- Master basic shapes (pinch, coil, slab) to build complexity.
- Finish with sealants to preserve color and structure.